The West Course
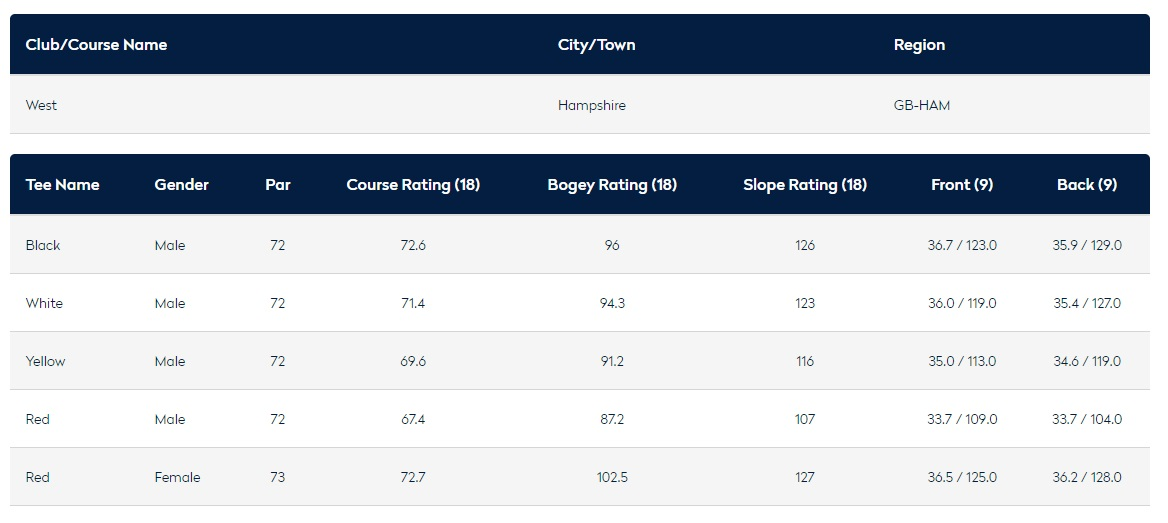
Our main 18 holes "The West Course" was designed by Sandy Burrell with Ken Moodie of Creative Golf Design and is a par 72 measuring 6808 yards from the black tees (slope rating of 126) , 6574 for the white medal tees (slope rating of 123) and 6189 from the yellow tees (slope rating of 116). The ladies course is a par 73 measuring 5635 yards (slope rating of 127).
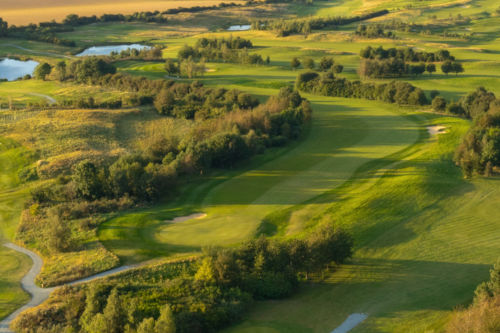
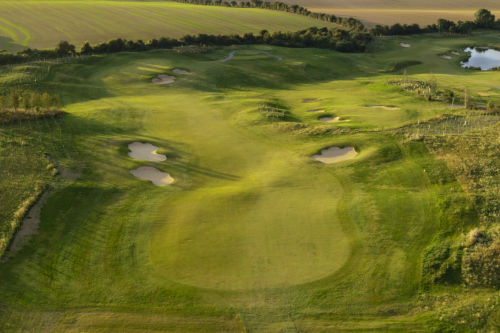
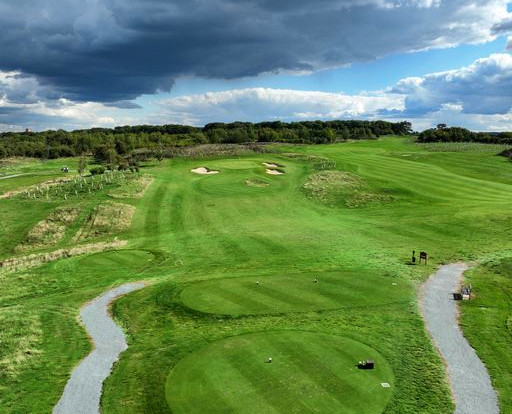
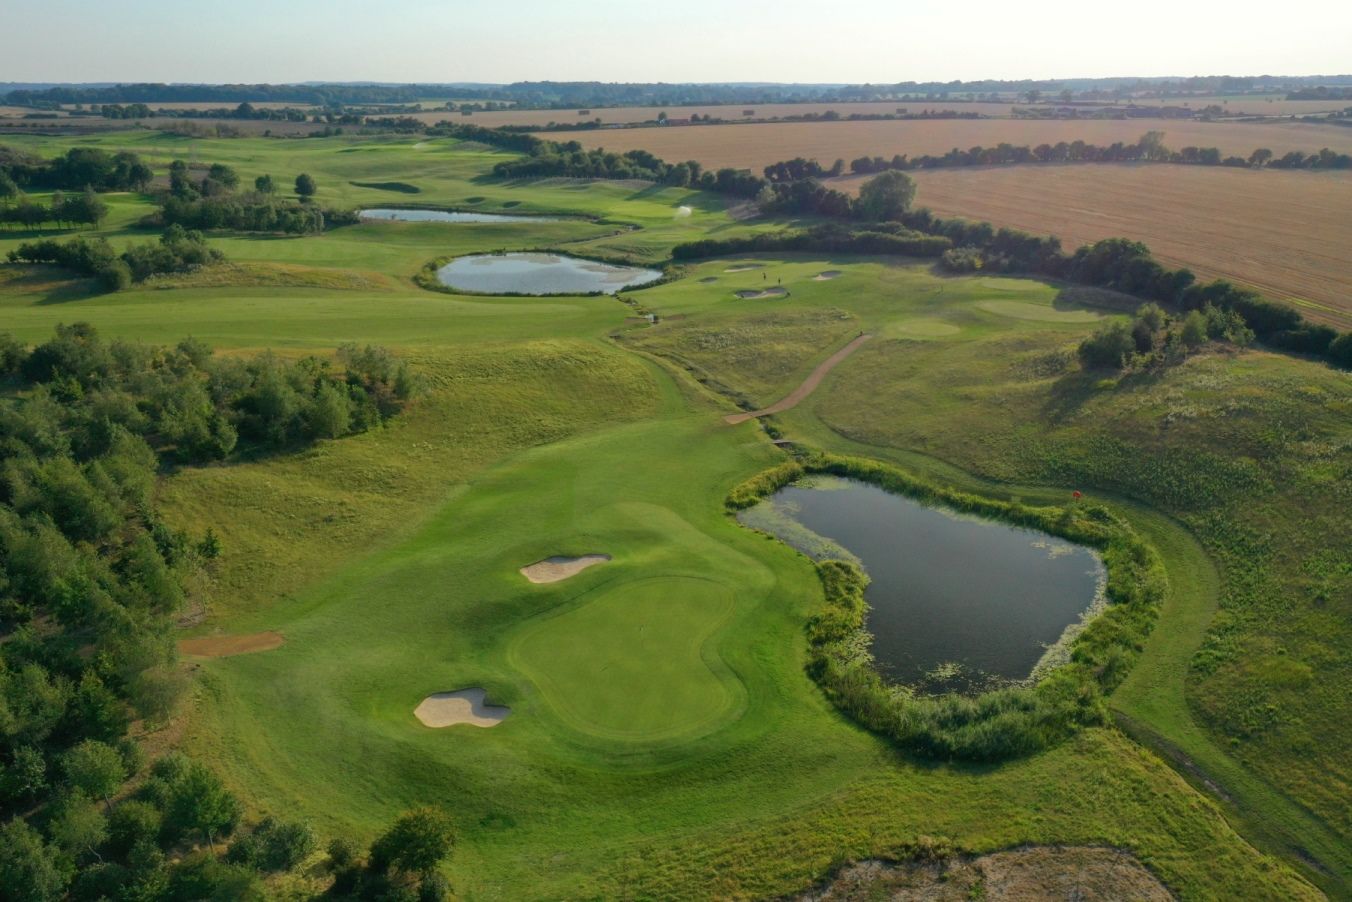
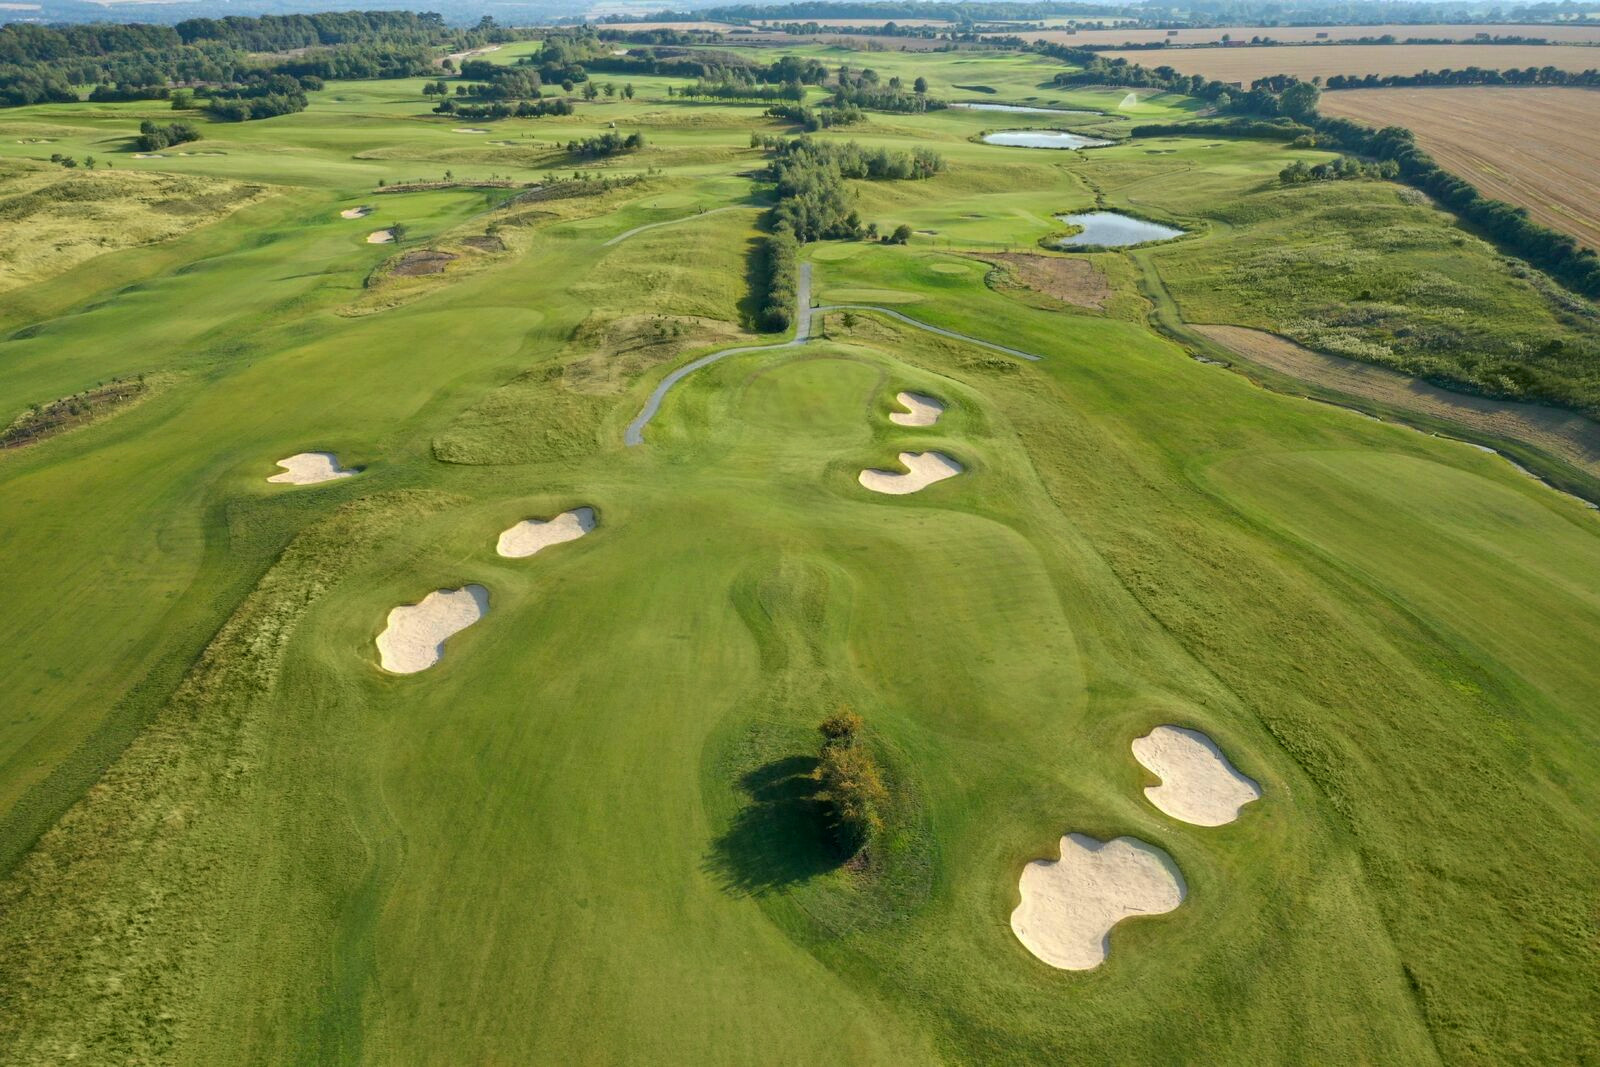
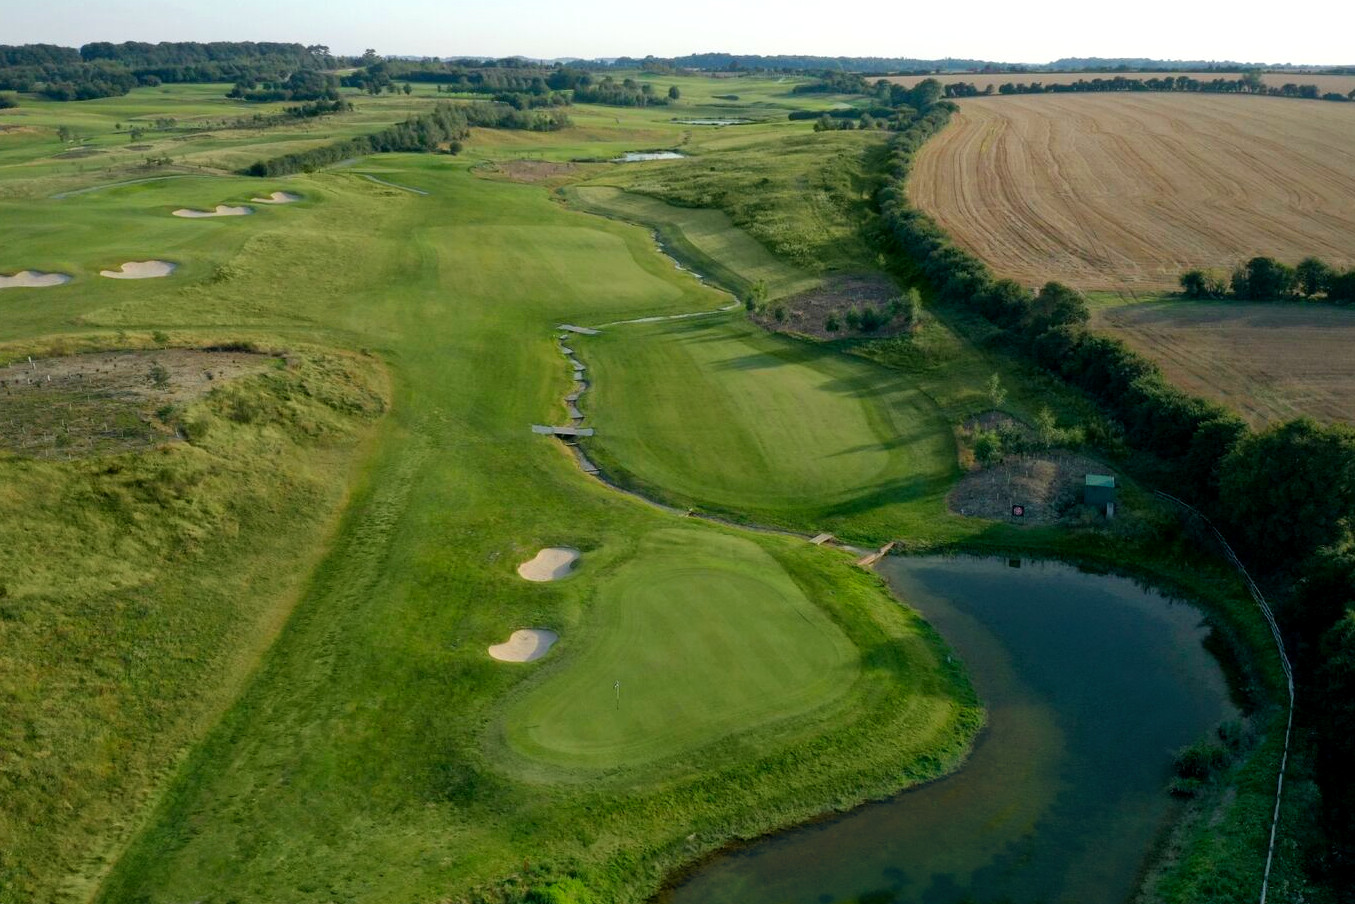
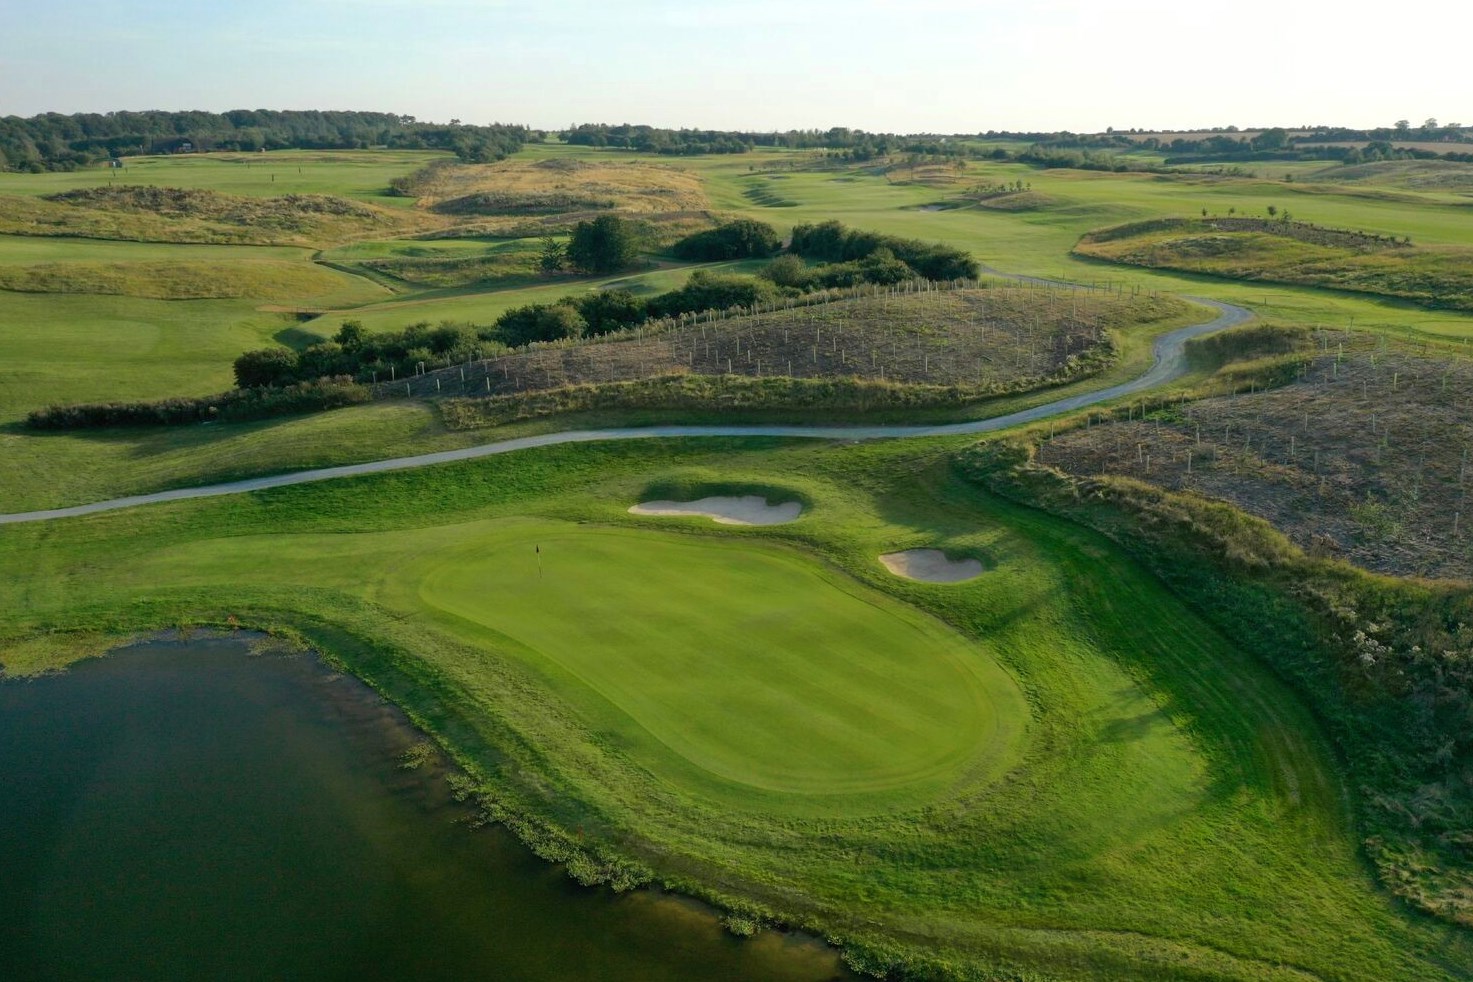
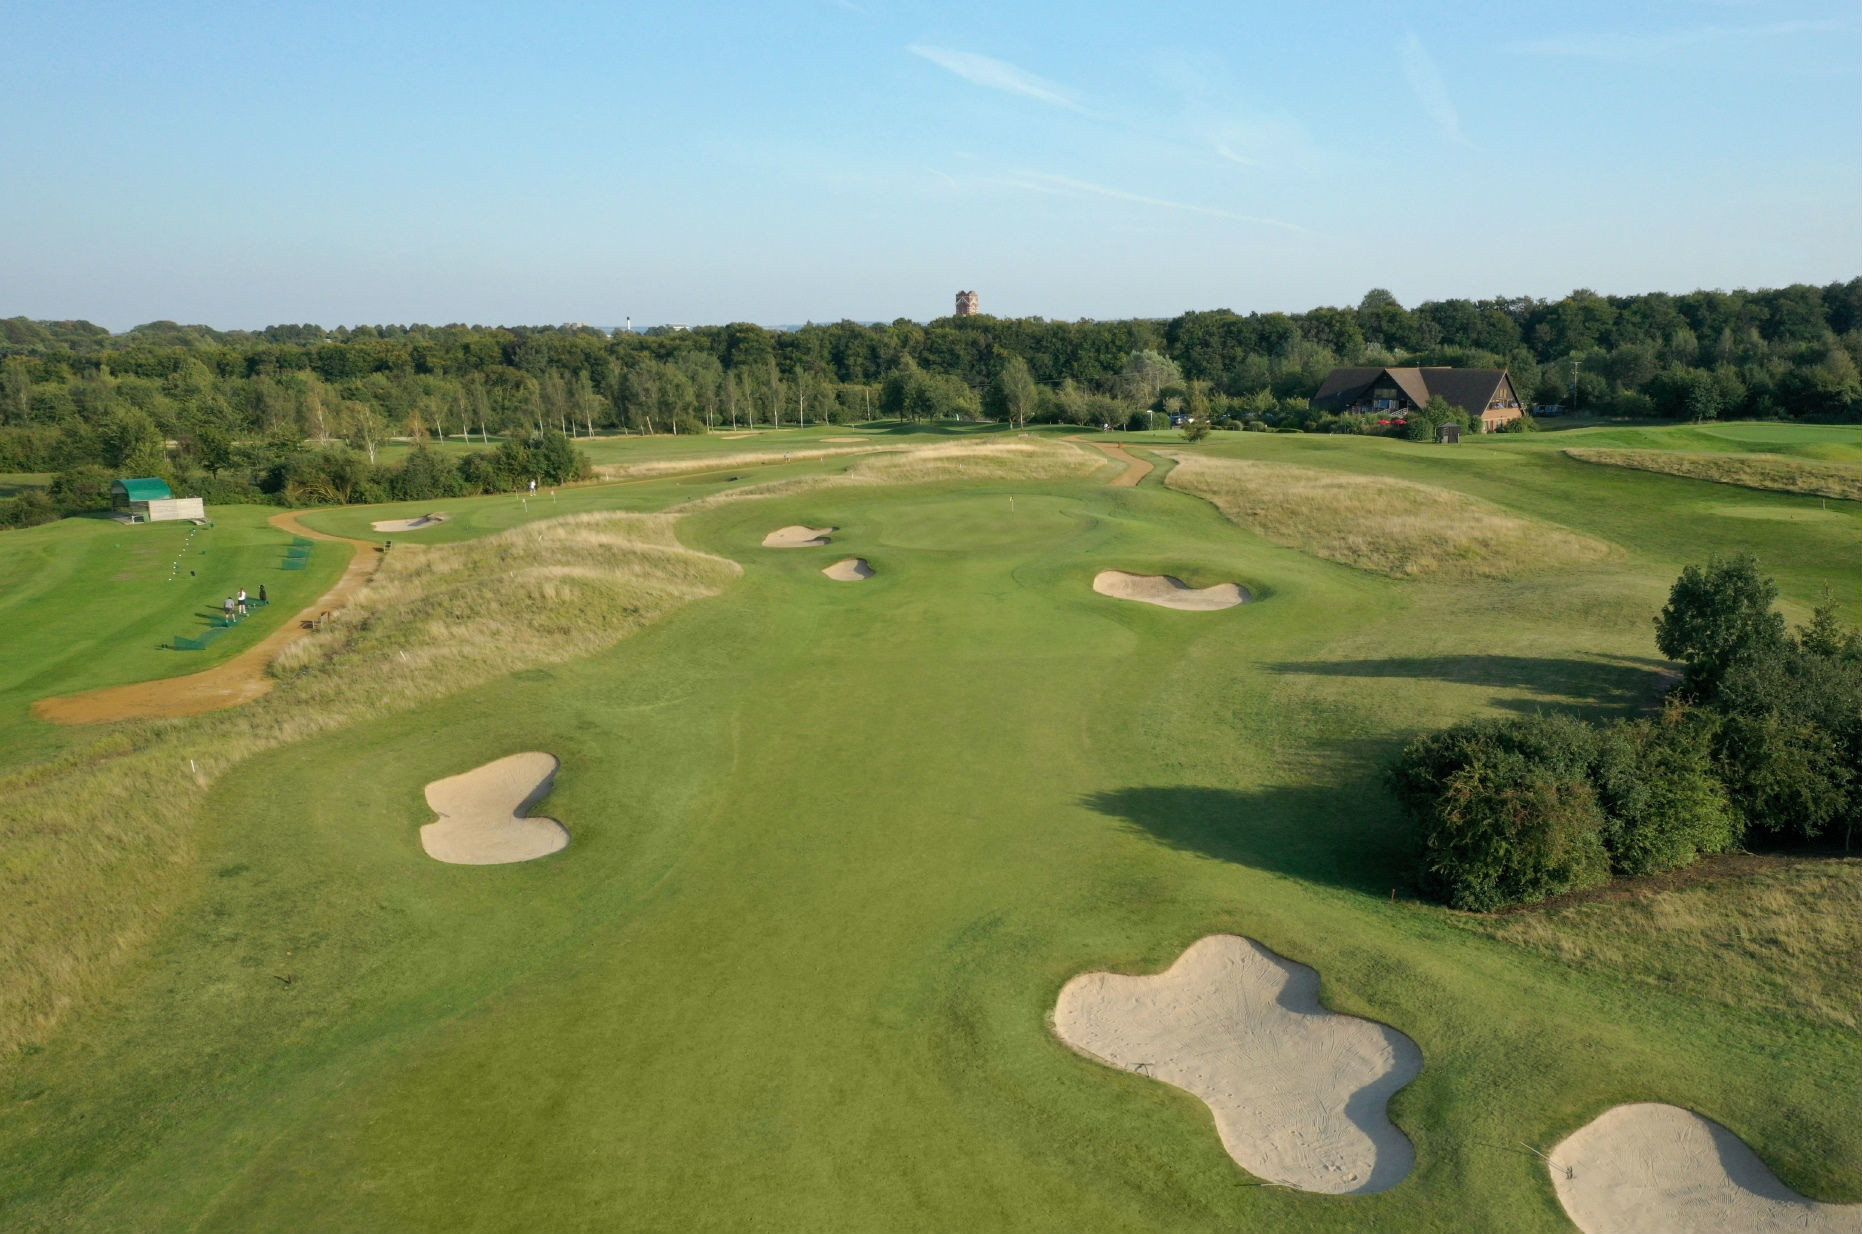
 The downland style course, host to many PGA and county tournaments, is located on an attractive undulating landscape with magnificent external views, features open grassland interspersed by newly planted clumps of indigenous woodland. Although a dry, fast running course, water will be a significant feature on The West Course with a series of four lakes located in natural valleys built into the course layout. The lakes are linked by a natural looking chalk stream which meanders through a valley, crossing the 14th fairway twice, before running into the small lake which wraps around the left-hand side and rear of the green.
Seven of the holes on The West Course will have water features directly in play. A feature of particular note is the new 8th green and the lake as inspired by the iconic 10th hole at The Belfry, which should provide a risk and reward challenge for members and visitors alike.
- 1
- 2
- 3
- 4
- 5
- 6
- 7
- 8
- 9
- 10
- 11
- 12
- 13
- 14
- 15
- 16
- 17
- 18
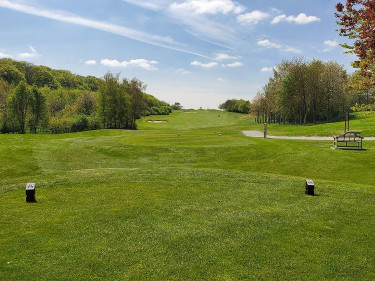
Hole 1 - Par 5
A straight, uphill par 5 first hole which provides you with enough room left and right to open up your shoulders and hit driver. A good tee shot and a solid second shot with the wind in the right direction will allow the longer hitters to go for the green in two. The green is protected by a large bunker on the left side, with A gently sloping green will tease you into hitting a bold putt!
| Tee | Yards | Par | S.I. |
| 508 | 5 | 11 | |
| 473 | 5 | 11 | |
| 432 | 5 | 7 |
Hole 2 - Par 4
The raised tee gives you a wonderful look over the rest of the course. the line for your tee shot is the left half of the fairway. This will give you maximum run from your drive and the best angle into the green. The hole continues downhill to the green. Bunkers protecting the green on both sides. A centred slope on the green, creates a good test, once putting.

| Tee | Yards | Par | S.I. |
| 439 | 4 | 5 | |
| 416 | 4 | 5 | |
| 381 | 4 | 5 |
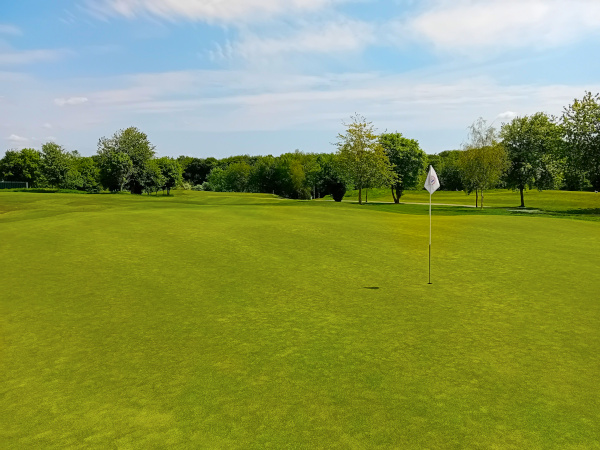
Hole 3 - Par 3
A large green with many slopes creating numerous different yardages/ pin positions. The right club and a solid strike will be the only way to get your ball close to the hole. Any off-centre hits will fall away down the slopes which surround the green or find one of the two bunkers short of the green.
| Tee | Yards | Par | S.I. |
| 143 | 3 | 17 | |
| 129 | 3 | 17 | |
| 119 | 3 | 17 |
Hole 4 - Par 4
The long hitter should hit driver and see how close you can get to the green, to give you the shortest possible second shot, but make sure you miss the left fairway bunker at 229 yards. The green is raised by a good 20 feet above the fairway level and is small and narrow with a deep bunker at the front. It will take a precise second shot to get the ball close here.
| Tee | Yards | Par | S.I. |
| 342 | 4 | 13 | |
| 324 | 4 | 13 | |
| 284 | 4 | 15 |
Hole 5- Par 4
The power players can take on the corner if they so wish, but a carry of over 240 yards is required to find the fairway. A miss right will find a large plantation area and a bunker left will collect the long-left miss. Your approach shot will play slightly uphill to a raised green which has plenty of protection with run of areas and a deep bunker level with the middle of the green to the right.
| Tee | Yards | Par | S.I. |
| 408 | 4 | 1 | |
| 392 | 4 | 1 | |
| 359 | 4 | 9 |
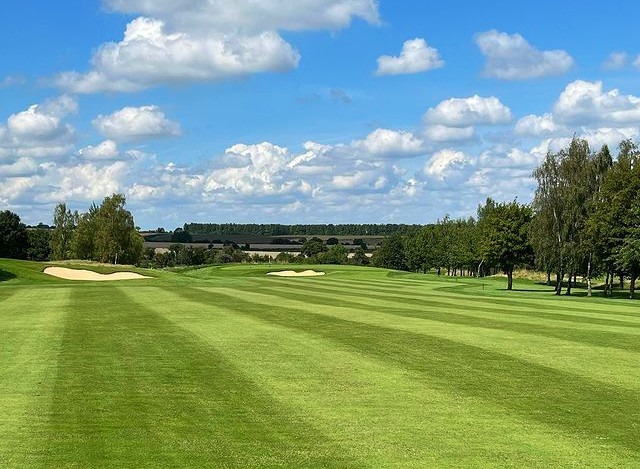
Hole 6 - Par 4
A magnificent view from the tee but it is a testing drive with bunkers either side of the fairway. Downhill slopes on the fairway will maximize any straight hitting. If you find the fairway you will need to hit a medium iron or hybrid to get to the green which is raised and positioned over the valley. With two greenside bunkers short right, a good couple of hits to the green should offer you a par or nett par and a hole to add to your list of favourites.
| Tee | Yards | Par | S.I. |
| 438 | 4 | 3 | |
| 385 | 4 | 3 | |
| 360 | 4 | 1 |
Hole 7 - Par 3
The first of Weybrook’s own Amen Corner. The high tee means you will be exposed to the elements and the Weybrook Winds. With the prevailing wind being into and from the right this hole will test the skills of all to hit this green in one. A grassy hollow short of the green and bunkers both left and right are there to catch any miss hits.
| Tee | Yards | Par | S.I. |
| 177 | 3 | 9 | |
| 159 | 3 | 9 | |
| 141 | 3 | 11 |
Hole 8 - Par 4
The 2nd hole of Weybrook’s Amen Corner is a risk/reward par 4. A raised tee gives you a clear view of the hole and where to hit it and where not to hit it! The left side of the fairway is the best option to avoid the water and to give you the best angle from which to approach the green. The green is narrow from front to back so giving yourself a short second shot will definitely help you to get the ball close and setup a birdie putt.

| Tee | Yards | Par | S.I. |
| 295 | 4 | 15 | |
| 275 | 4 | 15 | |
| 242 | 4 | 13 |
Hole 9 - Par 5
The final hole of the front nine is a long straight par 5. The fairway is fair in size, so take your big club out the bag and give it a solid whack! Certain days and conditions will allow the stronger player to get on in two, but not only do you need two solid strikes you must avoid the large deep bunker short left of the putting surface. The green is kidney shape in design and is long from front to back. This will change the length of the hole by as much as 25 yards and make putting interesting!

| Tee | Yards | Par | S.I. |
| 556 | 5 | 7 | |
| 547 | 5 | 7 | |
| 514 | 5 | 3 |
Hole 10 – Par 5
Starting from a raised tee gives you a great look of the hole from start to finish. The hole slopes downhill after your tee shot. There is a lake to the left side of the green and a stream running across the hole about 50 yards from the green. The green is long and narrow and well protected by four greenside bunkers.

| Tee | Yards | Par | S.I. |
| 556 | 5 | 6 | |
| 532 | 5 | 6 | |
| 471 | 5 | 6 |
Hole 11 – Par 3
A strong start to the back nine continues with a stunning downhill par-3 across water. The prevailing wind is from the right so be careful not to get caught out by the wind which will take your ball to the left which where you will have the biggest carry over the water. The bail-out shot is a 150-yard hit to the right where there is plenty of landing area for the shorter hitters.
| Tee | Yards | Par | S.I. |
| 186 | 3 | 8 | |
| 165 | 3 | 8 | |
| 143 | 3 | 12 |
Hole 12 – Par 4
Our longest par 4 on the course is the next challenge. Hitting a solid tee shot and avoiding the large fairway bunker on the left side will give you the opportunity to go for the green in two. The infinity green is protected by two bunkers on the left. A miss to the right will test your short game skills with a well-placed bunker and large valley. The green slopes from back to front with a slight tier through the middle.

| Tee | Yards | Par | S.I. |
| 458 | 4 | 2 | |
| 443 | 4 | 2 | |
| 412 | 5 | 14 |
Hole 13 – Par 4
Measuring just over 300 yards from the back tees, the stronger player should have a go for the green. The more reserved player should hit a 200 yard shot from the tee between the left fairway bunkers and the centre bushes. This will give you the best angle from which to approach the green from inside 100 yards. Again a long narrow green tests your distance control; however a birdie on this hole is not uncommon.
| Tee | Yards | Par | S.I. |
| 318 | 4 | 18 | |
| 296 | 4 | 18 | |
| 245 | 4 | 16 |
Hole 14 - Par 4
You can play this hole in many different ways; it’s about how much club you choose to hit from the tee to get you close to the green. Whatever club you hit, you must avoid the snake-like stream that runs down the left side of the hole and then cuts across the fairway at the 240 yard mark. The stream continues to snake down the right edge of the hole from around 100 yards then sweeps back across the front of the green and finally connects to the large pond that sits adjust to the left edge of the green. The green slopes severely the green slopes severelyfrom back to front and has a smallplateau area at the back.
| Tee | Yards | Par | S.I. |
| 362 | 4 | 12 | |
| 339 | 4 | 12 | |
| 326 | 4 | 2 |
Hole 15 – Par 5
The final par 5 on the back nine, measuring 509 yards and playing downhill initially it can offer you a birdie or better chance, but can also be a card wrecker with out of bounds all the way down the left side of the hole and a lake to the right. To get to the green you must avoid the three bunkers across the fairway and the deep bunker on the approach to the green on the right. The uphill approach shot makes club selection tricky, but is essential to find this narrow kidney shape green with a tier running across the first third of the green.

| Tee | Yards | Par | S.I. |
| 502 | 5 | 10 | |
| 466 | 5 | 10 | |
| 438 | 5 | 8 |
Hole 16 – Par 3
A beautiful and fun par 3. The green is about 40 feet below the level of the tee, and you must hit enough club and hit it solid to carry the lake which runs across 2/3 of the green. If you are overcautious, two deep bunkers at the back of the green will test your short game skills. It’s a dramatic green with a 3-foot mound back centre. The whole green running downhill to the lake makes two putts no easy task.
| Tee | Yards | Par | S.I. |
| 145 | 3 | 16 | |
| 141 | 3 | 16 | |
| 120 | 3 | 18 |
Hole 17 – Par 4
A perfect drive is one which starts left centre of the fairway with a touch of fade to follow the dogleg of the hole and miss the deep bunker set into the right edge of the fairway. Playing into the prevailing wind the approach shot can be a long one, so make sure you take plenty of club to get your ball onto the deep green. The approach will need to be hit solid and also straight to dodge the bunker which sits to the right some 50 yards short of the green. There are two deep green side bunkers on the left.

| Tee | Yards | Par | S.I. |
| 412 | 4 | 4 | |
| 378 | 4 | 4 | |
| 342 | 4 | 4 |
Hole 18 – Par 4
A perfect drive is one which starts left centre of the fairway and moves from left to right to follow the dogleg of the hole to miss the deep bunker set into the right edge of the fairway. Playing into the prevailing wind the approach shot can be a long one, so make sure you take plenty of clubs to get your ball onto the deep green. The approach will need to be hit solid and also straight to dodge the bunker which sits to the right some 50 yards short of the green. There is also a deep green side bunker waiting for any miss hits to the left.
| Tee | Yards | Par | S.I. |
| 351 | 4 | 14 | |
| 332 | 4 | 14 | |
| 306 | 4 | 10 |
-
Slope Rating and Handicap Tables Open or Close
A USGA Course Rating is the evaluation of the playing difficulty of a course for scratch golfers under normal course and weather conditions. It is expressed as strokes taken to one decimal place, and is based on yardage and other obstacles to the extent that they affect the scoring ability of a scratch golfer.
A Slope Rating evaluates the relative playing difficulty of a course for players who are not scratch golfers. The lowest Slope Rating is 55 and the highest is 155. A golf course of standard playing difficulty has a Slope Rating of 113.
Course ratings are determined, by permission of the USGA, in accordance with the USGA Course Rating System™ for the purpose of providing a uniform basis of which to issue a Handicap Index.
USGA Course Rating, Slope Rating®, and Handicap Index® are marks owned by the USGA and may only be used in connection with the USGA Handicap System™
Certificate Number: 1018797
West Course Handicap Tables